In this tutorial I will explain the method of setting the IK handles.
When the joints are set to the models of the character, binds are done,
and the skin weight is adjusted,
you can make animation by setting the keys to the joints.
When operation to which the character grips the ball is done for instance,
each joints of the shoulder, the elbow, and the wrist are rotated from the upper-body,
and however, when the angle of the joint of "parents" is changed
even if the palm is taken to the position of the ball,
the hand is away from the ball,
and the angle adjustment of each joints are needed again.
Then, to control the joints from "child" of the joint,
you will set IK(inverse kinematics) handles.
For the explanation about the skeleton and skinning, please refer to
Maya: character setup (1): skeleton and skinning
For the explanation about adjusting skin weights, please refer to
Maya:character setup (2): adjusting skin weights
 Setting of IK handles
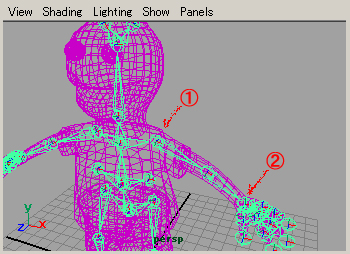
Select Skeleton > IK Handle Tool
Click the joint of the shoulder and the joint of the wrist in this order.
The IK handle is made, and you can move it with the Move tool.
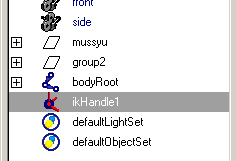
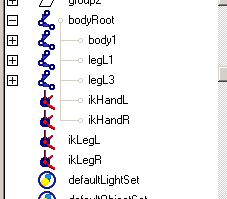
It is displayed by the icon like the above figure in Outliner.
Set the IK handles to both hands and both feet.
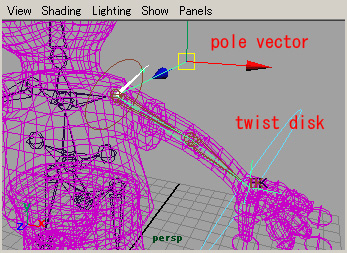
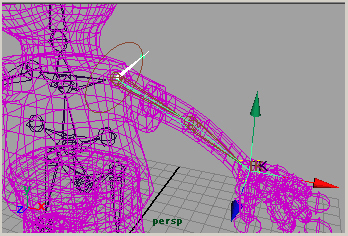
When you select the IK handle, and
 (Show Manipulator Tool) is clicked,
the pole vector is displayed in the shoulder
the twist disk is displayed in the wrist
as shown in the above figure.
You can move the pole vector with the Move tool.
You can move the twist disk by clicking directly.
You can control the direction of the elbow and the direction of the knee
by using both the pole vector and the twist disk.
(You can drag the manipulator of the pole vector
to the place where you can select it easily.)
You can make the animation by setting the key frame to the IK handles.
Setting of preferred angles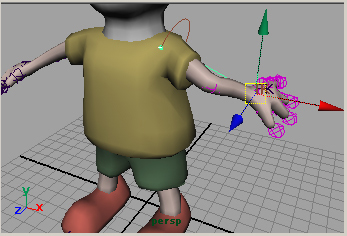
When the IK handles are set,
the joint might turn in the direction that you do not intend.
(Though it doesn't happen when you have applied the angle before binding the joints)
At this time, bend the joint in the direction where you want to bend it,
select the joint
Skeleton > Set Preferred Angle
Then you can set the IK handles.
Tree structure of the IK handle and the joints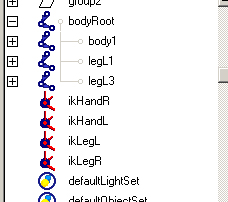
In the tree structure that there are no "parent and child" relations
in the IK handles and the joints as showing in the above figure of the Outliner,
you struck a key frame (once) to the IK handles of the arm and the foot,
and set the key frames to bodyRoot (the root joint).
Then, you will see animation where bodyRoot, the arm, and the foot
do not move together as shown in the above figure.
You make the IK handles of the arm the "child" of bodyRoot.
Then, you will see animation where the foot is fixed
and bodyRoot and the arm move together as shown in the above figure.
In the animation of walking or running, the foot of the character grounds.
For that case, you will not make the IK handle of the foot
the "child" of the root joint.
It will be easy to set animation.
In animation that the character flies up and makes one rotation,
you will make the IK handle of the foot the "child" of the root joint.
Anyway, it is necessary to set "parent and child" relation between
the IK handles and the joints by the movement of animation.
IK spline handle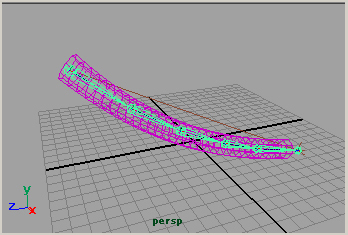
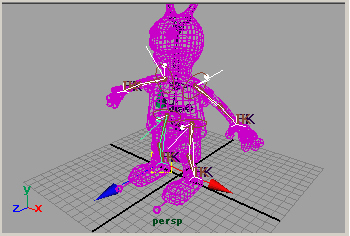
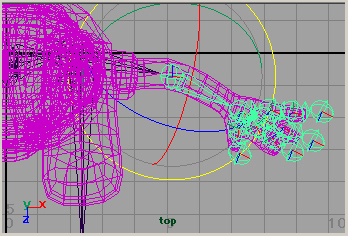
For instance, the IK spline handle is set
when a lot of joints are connected and move like a tail.
Select Skeleton > IK Spline
click the start and the end of the joints.
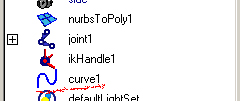
The NURBS curve is made with the IK spline handle as shown in the above figure.
The joints move according to the curve when you move the CVs of this NURBS curve.

The spans of the NURBS curve is 1 in default, you change it if necessary.
Select Skeleton > IK Spline Handle Tool

change Number of Spans
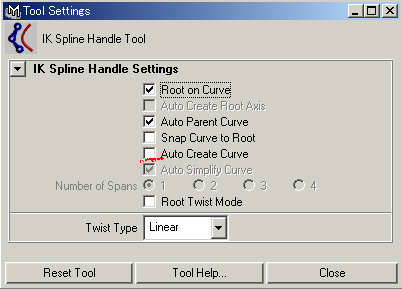
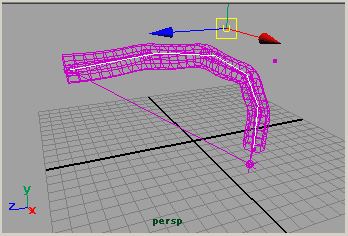
Moreover, the NURBS curve is not generated automatically,
and you can control the IK handles making another NURBS curve.
Make a NURBS curve.
Select
Skeleton > IK Spline Handle Tool

uncheck Auto Create Curve
select the start of the joints, the end of the joints, the NURBS curve in this order.
Japanese article
Maya tutorials:character setup (3): IK handle

hi,good one,i am also learning rigging,could u please tell me good tutorial site for rigging.
Thank you for your comment.
I do not know a good site to our regret.
I constrain the Pole Vector to a Locator.
I display the selection handle of a joint.
I will write the tutorial of this method some time.
give the information about riging
I will write a tutorial of rigging.
nice,, i'll try this..thx
good
i am about to try your method of IKs, but would like to know if you have a rigging tutorial as well? i have been trying to do a spline spine over & over but the connections on the spine come through the Y axis and they need to go through the x axis. i was following a tutorial i had, but cant see why it wont work the second time around. anyway if i could try a completely different tutorial, i think that would be more encouraging.
thanks for taking the time to do the above tutorial for us.
A simple rigging method is to constrain the Pole Vector to a Locator
and display selection handle of joints.
You can move a selection handle by component mode(F8).
plz send me tutorial of maya rigging