To animate character objects,
you should setup the skeleton and make the objects skinned.
In this tutorial, I am going to explain how to construct joints
and how to bind the objects to the skeleton.
 The basics of joints
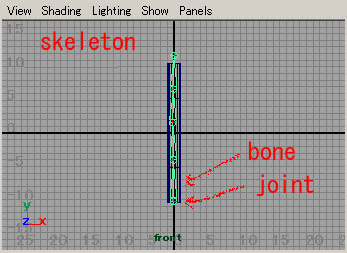
Make a polygon cylinder with hight divisions 4.
In the Animation Menu Set
Skeleton > Joint Tool
Click 4 or 5 times at the center of cylinder,
press the Enter key to complete the joint chain.
You can see small circles and arrows between the circles.
The circles are called Joint, the arrows are called Bone,
and all the circles and the bones system is called Skeleton.
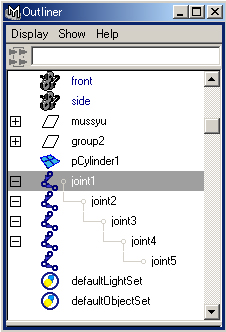
You can see the joints are hierarchical (parents and child relationship)
in the Outliner.
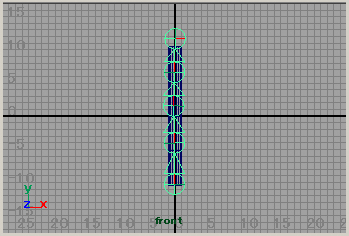
You can change the joint size with
Display > Joint Size
Select the cylinder and joint1
Skin > Bind Skin > Smooth Bind
Now you rotate the joints, the cylinder object is deformed.
And if you selsect the joints, the object reverses in red.
The process to make the objects deformable with the joints is called Bind.
And the binded objects are called Skin.
Setting up joints with the character objects
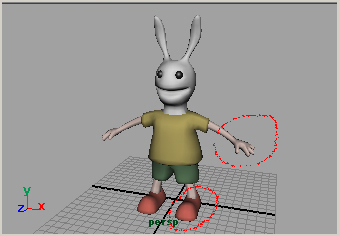
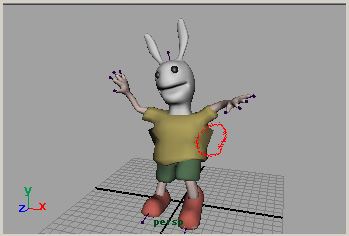
It is recommended to make a character object posing....
the hands are horizontal or slightly lowered.
the legs are slightly opened.
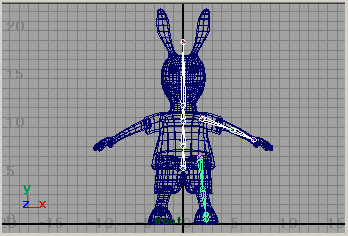
You will put the joints in this order, and press enter key.
The center of body: belly - navel - root of shoulder - neck - upper of head - Enter
Arm(left side): shoulder - elbow - wrist - Enter
Leg(left side): root of leg - knee - ankle - foot ahead - Enter
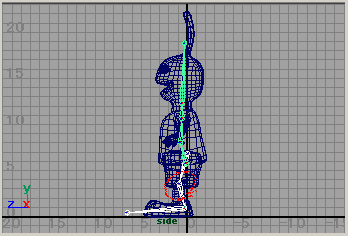
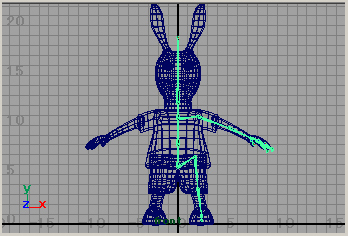
Side view is the above.
The joint of the knee is lightly bended.
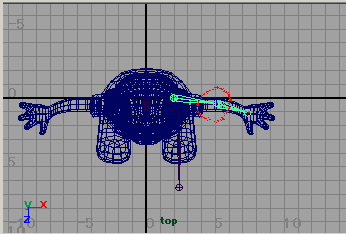
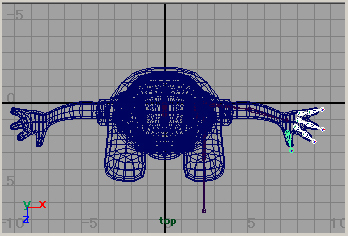
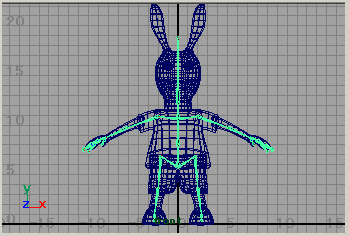
Top view is the above.
The joint of the elbow is also lightly bended.
Because the joints are hierarchical, if you move the parent joint the child Joint moves together.
To move only the parent joint, turn the Move Tool to Pivot mode with Insert key.
Setup finger joints as the above.
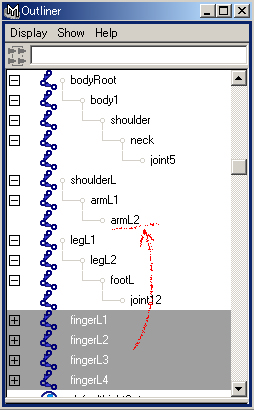
The names of the joints are changed.
bodyRoot the center of body
shoulderL the left arm
legL the left leg
finger 1 - 4 the fingers
Move finger 1 - 4 with  to the child of armL2.
Also move shoulderL to the child of shoulder.
Legl1 to child of bodyRoot.
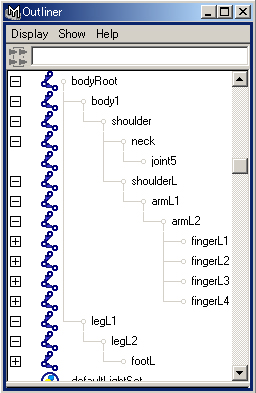
In the Outliner the hierarchy of joints are as the above.
You see the joints are chained with Bones.
Select shoulderL
Skeleton > Mirror Joint 
in the Option window, select Mirror Across YZ
Select legL1
Skeleton > Mirror Joint
The joints are mirror copied and are completed.
You will change the names of the copied joints.
Select bodyRoot joint and all of the model objects
Skin > Bind Skin > Smooth Bind
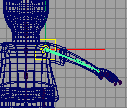
Then if you select the joints, the object reverses in red.
You should rotate the joints while choosing all of them one by one,
and check whether the position of the joint is appropriate as a joint.
And you should also check whether they are appropriate for
the animation which you will make.
At this stage, you need not worry because you will correct the place
where an unnatural deformation such as armpits has happened.
Correcting the position of the joints
(1) Select the joint and Skin > Go to Bind Pose,
the pose of the object will return first.
(2) Select the all of objects and Skin > Detach Skin,
the skin(objects) will be unbinded.
(3) (If it is necessary,) delete the right half of the joints.
(4) Correct the position of the joints.
(5) Repeat the procedure of the mirror joints and bind.
(6) Change the names of the joints.
Moreover, because the number of divisions is few,
the part where the joint was bent might look rough.
It is necessary to correct the modeling data before you do bind.
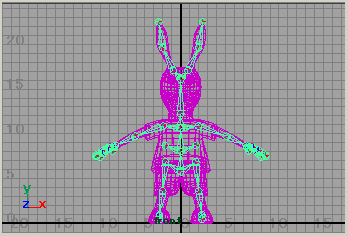
The correction result of the joints is the above.
Joints of the ear and joints of the side were added.
Because the side was greatly deformed when the joints of the arm was moved,
the joints of the side was put to control it.
If you set the key frames to the joints by the setting to here,
you can make basic animation.
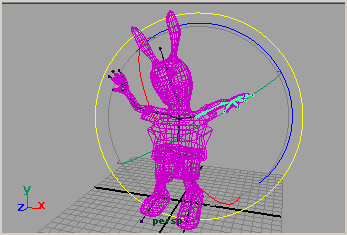
You should move the object by not the modeling data but the root joint.
The rotation and the scale are also similar.
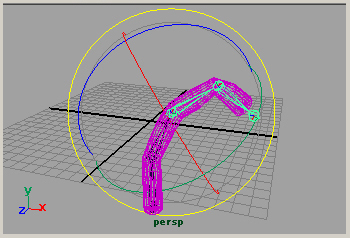
Smooth bind and rigid bind
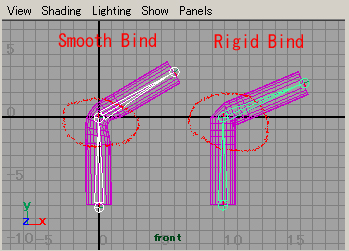
Make two polygonal cylinders with a lot of numbers of
divisions in the center, and put joints on
the inside as shown in the above figure.
Execute the following two.
Skin > Bind Skin > Smooth Bind
Skin > Bind Skin > Rigid Bind
Left is smooth binded, and right is rigid binded.
In smooth bind, it can be seen to be bent smoothly.
In character animation, I recommend you to do bind with smooth bind.
Maya tutorials: character setup (1): skeleton and skinning

thanks dude :)
Thank you very much for your visiting and commenting.
Thanks for the great tutorial! Really pulled me through that class assignment!
Thank you very much for your visiting and commenting.
This character setup tutorial continues.
I will write
character setup (4) blend shape
character setup (5) wire tool
Very very informative.
Your teaching method is uncomplicated and intuitive.
Congrats and keep up the excelent job.
Thank you very much for your comment.
I am glad that you say "uncomplicated and intuitive".
I like your step by step explanation, greate work
keep providing us with nice tutorials
Thank you very much for your visiting and your comment.
excellent tutorial!, though it was quite hard on a fish i moddeled :)
ps, is there a way to influence the "soft selection" of the bones? It seems like a bone section grabs a range of vertices. But when i move a bone all the vertices seem equally influenced, i want the vertices who are the closest to the bone te move more then the ones on the far end...
Thank you for your comment.
Do you use the Smooth Bind?
The vertices will be weighted, and you can adjust them.
Please refer to
Maya tutorials:character setup (2): adjusting skin weights
To animate a fish, the IK Spline Handle is good.
The Flow Path Object is also useful.
(Animate > Motion Paths > Flow Path Object)
your teaching style is too good .u made it too easy for fresher just like me excellent work keep it up.waiting for ur next tuts.
Thank you for your comment.
Excellent tutorial this is what I was looking for all over.
THANK YOU.
Thank you!
You are a lifesaver! Thank you so much, I wouldn't have been able to finish my finals without this tutorial! :)
I am glad to be able to help you.
very good