In this tutorial, I will explain the method of animation of face of the character
(facial animation).
I will explain the setting of the constraints and the blend shape deformers.
 Preparation
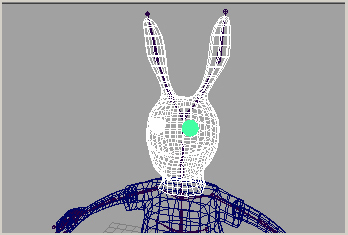
Unbind the object to which you will apply the facial animation.
Select the object
Skin > Detach Skin
(You will leave the eyeball unbinded.
You will bind again the objects other than the eyeball later.)
Settings of the eyeball
Set The pivot point of the eyeball to the center of the object.
Select the eyeball
Modify > Center Pivot
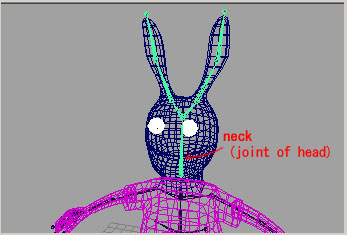
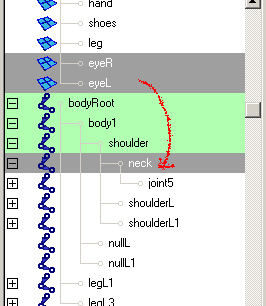
Make the eyeballs the "child" of neck (the joint of head).
The easiest method is to rotate the eyeball in this place and to set the keyframes.
You may have the eyeball can controlled the glance ahead.
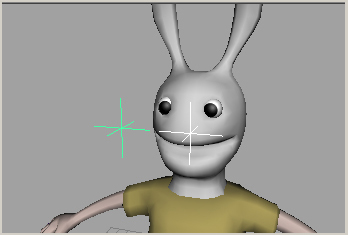
Make two locators
Create > Locator
then move them to the front of each eyeball.
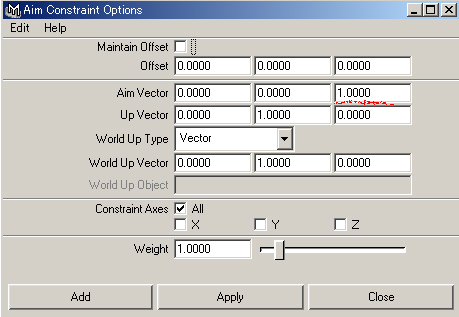
Select the locator and the eyeball in this order
Constrain > Aim Constrain

If the eyeball turns Z axis first、Aim Vector 0 0 1
Make a group of the locators, make it the "child" of neck (the joint of the head).
You will move this group,
when you move the eyeballs to the same direction.
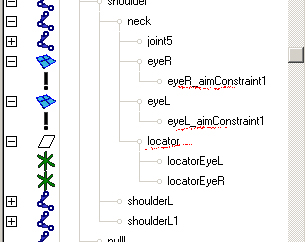
You will see the node of the aim constraint under the each eyeball.
(If you want to release the constraint, you should delete this node.)
Basics of the blend shape deformers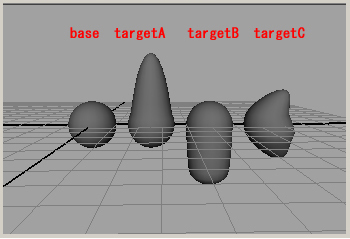
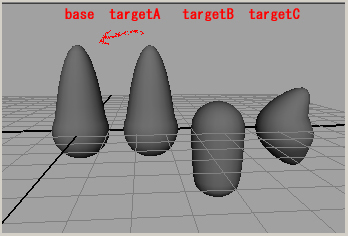
Duplicate a ball of polygon or NURBS.
Name them base, targetA, targetB, and targetC.
Deform targetA, targetB, and targetC by moving vertices or CVs
as shown in the above figure.
Select targetA, targetB, targetC, base in this order,
Deform > Create Blend Shape
The blend shape deformer node was made.
Objects whose shapes you want to use to deform the shape of another object
are called the target objects,
and the object being deformed is called the base object.
The base object's resulting deformed shape is called the blend shape.
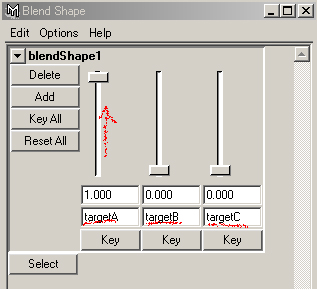
Open the Blend Shape Editor Window
Window > Animation Editors > Blend Shape...
There are a target object name and a slide bar corresponding to it.
When you raise the slide bar up
the base object becomes the shape of the target object.
The numerical value enters under the slide bar
according to the position of the bar.
It is possible to input directly.(A minus value also).
When the Key button is pushed, a keyframe is set.
When the KeyAll button is pushed, the keyframe is set
to all target objects.
When the Select button is pushed, the blend shape deformer node
(in this case, blendShape1) is selected,
and you can display the blend shape deformer node in the Graph Editor
or if necessary you can delete it.
It is necessary to deform the target object in Component mode (i.e. vertices, CVs).
In Object mode, blend shapes are not deformed with transform, rotation, and scale.
Once you setup the blend shape,
you must not delete and not add vertices or CVs of the all objects.
Setting of facial expression with the blend shape deformer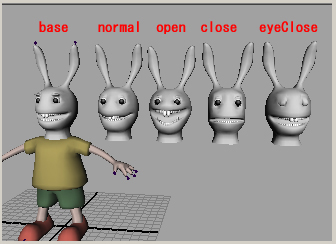

You should duplicate the object.
The frequency is the same as the number of the facial expression that you need.
You deform the duplicated object, and you model the facial expression.
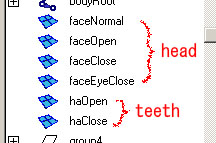
When it is not a single object, you should make them to the group.
You should make the order of the object in the group the same order.
The above figure is an example of the face objects and the teeth objects.
Select the target object (or group) sequentially,
and select the base object (or group) at the end.
Deform > Create Blend Shape
Open the Blend Shape Editor Window
Window > Animation Editors > Blend Shape...
Setup keyframes of the target objects and make your facial animation.
You may make two or more blend shape deformer of each object without making it to one group.
(for instance, face and tongue, etc.)
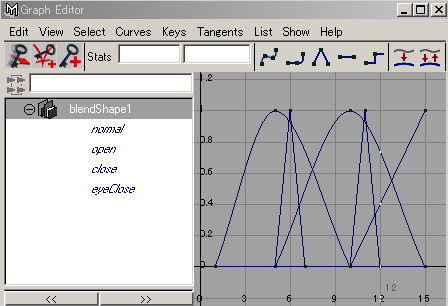
You can edit the keyframes of the blend shape deformer with opening the Graph Editor
After setting blend shape deformer,
you can deform the target objects again.
If necessary, you deform them and adjust the facial expression.
Setting of blink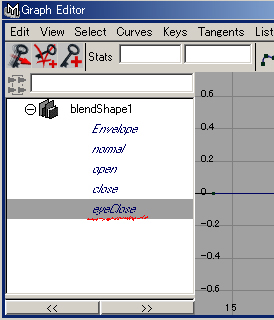
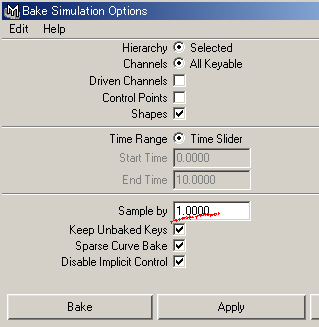
Select the target object that shuts eyes in the Graph Editor,
Edit > Keys > Bake Simulation
Set 1(default) to Sample by value then push Bake button
You will get all frames keyframed.
(In general, Bake simulation is a command that converts the simulation
of the dynamics into the key frame.
Here, I used it to make the keyframes simply every one frame. )
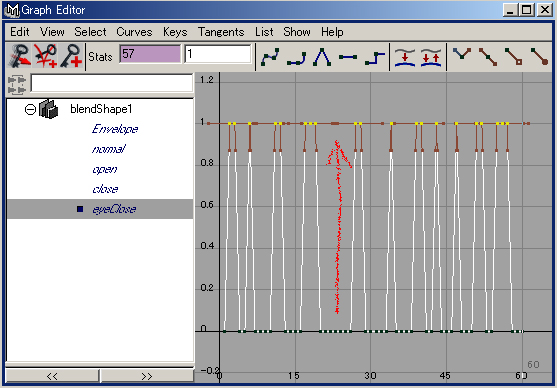
You choose about three frames from one at random,
and lift up to 1 with the Translate tool.
(This is an easy setting method.
Of course, there is a smart method made random by MEL or Expression, too. )
Moving blend shapes together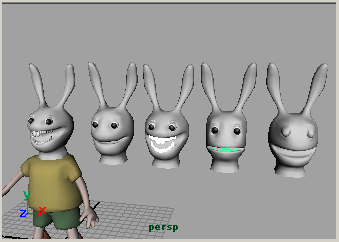
If the number of the target objects is not same as shown in the above figure,
you can't make them to groups,
and you also can't make them one blend shape.
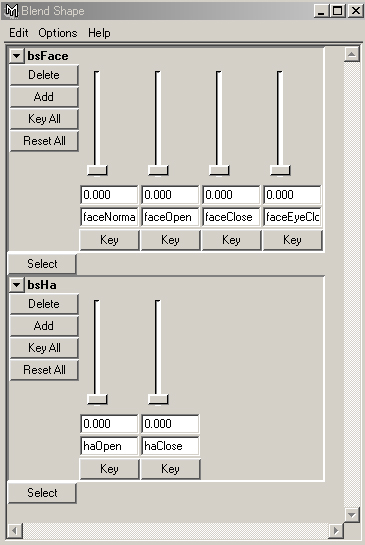
Then, you make the blend shape of the face (bsFace),
and the blend shape of the teeth (bsHa).

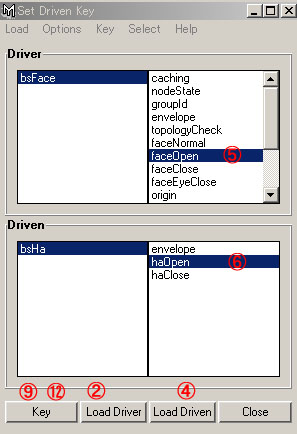
Open the Set Driven Key Window
Animate > Set Driven Key > Set
(1) Push Select button of the blend shape of the face (bsFace).
(2) Push Load Driver button of the Set Driven Key Window.
(3) Push Select button of the blend shape of the teeth (bsHa).
(4) Push Load Driven button of the Set Driven Key Window.
(5) Click the face target object that moves together (faceOpen).
(6) Click the teeth target object that moves together (haOpen).
(7),(8) Set 0 to the value of target objects.
(9) Push Key button of the Set Driven Key Window.
(10),(11) Set 1 to the value of taget objects.
(12) Push Key button of the Set Driven Key Window.
Then, the slide bar of the teeth target object moves,
when you move the slide bar of the face target object.
Repeat (5) - (12) process for each target objects that move together.
It is also possible that you set two or more teeth target object to the face target object.
Japanese article
Maya tutorials:character setup (4): facial animation

The best information i have found exactly here. Keep going Thank you
These are really helpful thanks!